Pages

Tuesday, May 7, 2013

Chicken Nuggets

Hello dearies,

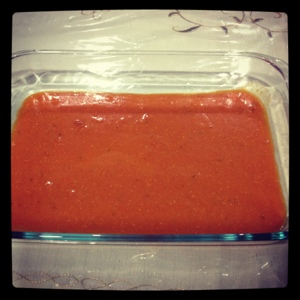
Remember I was rambling on and on about yoghurt few months back? Hehe.. So, I kept a few entries that I forgot to publish regarding how I use the yoghurt.. Here's one recipe that I cooked using that very ingredient, chicken nuggets. It's really quite easy to make.. The picture below is the baked version.. I also fried some in shallow vegetable oil.. Sorry, no picture on the fried version though.. Personally, I prefer the fried ones.. But of course, I suppose the baked ones are a  lot healthier.. hehe..


I modified the recipes techniques I posted in this entry. Here's how I cook my Chicken Nuggets..

The marinade & the dip..
1 chicken breast - fillet and cubed
Salt
1 cup cup plain yogurt
1 cup mayonnaise
1 garlic - grated finely like garlic paste
1/3 grated parmesan cheese

  1. Fillet and cut your chicken into small bite sized cubes/pieces.
  2. Lightly sprinkle some salt.
  3. Combine yogurt, mayonnaise and garlic in a bowl. Divide the mixture by half. Add in grated parmesan in one bowl/container. Keep that one in the fridge.
  4. Dunk your chicken pieces into the other half of yogurt mixture (the one without parmesan in it). Let sit in the fridge for a minimum of 1 hour. 

When it's time to cook the nuggets, take 3 shallow dishes out. I just used 2 flat plates and a shallow bowl.. 

In the first plate (Plate A), I put in these ingredients:
1 cup all purpose flour /tepung gandum
A dash of paprika
A dash of oregano powder

And in the shallow bowl (Bowl B),
2 eggs
Salt
Pepper

Lastly, in the second plate (Plate C), I put in:
1 cup breadcrumbs - baked for about 5 minutes
1/3 cup grated Parmesan cheese
A few dashes of garlic powder


Directions:

  1. Preheat oven to 180C. Spread breadcrumbs in a baking dish and bake until golden, around 5 minutes or so.
  2. Combine all ingredients in plate A, Bowl B, Plate C accordingly.
  3. The following steps are a bit messy, so you might want to do one step at a time, or one batch at a time.. First, coat the chicken in Plate A, the flavoured flour, then dip in Bowl B, the eggs and lastly transfer to Plate C to coat them evenly in the flavoured breadcrumbs.
  4. If you want to bake these delicious goodies, just arrange them nicely on a lightly oiled wire rack (set it inside the same baking dish you use to bake the breadcrumbs). Bake until chicken is thoroughly cooked, for about 12 - 15 minutes. Or you could just spread more bread crumbs inside the dish and arrange them nicely to bake. If you want to fry them, you have the option of using small amount of vegetable oil or deep fry them, your choice.
  5. Serve hot out of the oven with your homemade dip. You may sprinkle with some salt and pepper if you like.
Note: You might want to put a small blob of butter on each nugget for that golden effect. I didn't, hence the pale color. :)

So yeah, not too hard to make, aye? Gotta love simple food like these. The dip/marinade can be made ahead of time. It should hold well in the fridge for about a week. Happy cooking.. 

Toodles!


Friday, February 8, 2013

Enchilada

Last Sunday, I woke up wanting to cook lasagne.. But a few key ingredients were missing and I was soo lazy to go to the market.. Inspiration struck, so I changed plan.. I did Mexican fusion food instead.. Enchilada.. Mexicans love their chillies.. So do us Malaysians.. Mexicans have Habanero, Ancho Chillies, Chipotle, Jalapeno, just to name a few.. Malaysians love their bird's eye chillies or cili api.. small but fiesty.. yum!

But this dish I made wasn't exactly fire-y hot.. I mean, not everyone can take a lot of heat.. So, I went a bit mild, using whatever I have in the kitchen.. So, here's my fusion recipe, with some pics.. Enjoy..

For the beef, I basically combined the recipes and techniques from this blog, plus '30 Minutes Meal' cooking show that I watched over Food Network Asia on Astro just recently (The name of the chef is Rachel something if not mistaken).. Anyway, I ended up cooking it this way..

The Minced Beef:


Ingredients:
Olive Oil
1 kilo minced beef
1 1/2 green onion (or bawang bombay)
Smoked Paprika
Serbuk jintan putih (OK tipu... sebab malas nak tumbuk/blend, taruk je dalam keadaan asal.. konon it'll give some bite.. haha)
Serbuk ketumbar
Black Pepper
Garlic Powder
Salt


*The amount of spices is based on pure instinct.. You know, a dash of this, a dash of that.. So, trust your instinct, use your nose, your eyes, your tongue untuk merasa makanan yang anda masak..

  1. Heat oil, pour in minced meat.. 
  2. Fry on medium heat.. Add in onions and the spices..
  3. Stir just occasionally.. Bukannya masak rendang, nak kena kacau selalu.. 
  4. When it looks brown and delicious.. Add in some salt..
  5. Do the taste test... Grab a spoon and makan..
  6. Kalau sedap, then it's done.. Kalau tawar, tambah garam.. Kalau kurang pedas, tambah paprika.. Kalau terover masin / pedas.. Hurm, pasrah je la kot.. hehe..

Note 1: What I would do differently is perhaps tumis bawang sampai agak2 layu then add in cili blender.. Tumis sampai wangi.. Then add in minced beef.. hehe.. Kalau dah tekak Melayu tu kan.. Mesti nak cili dulu, kini dan selamanya.. Hehe...
Note 2: If you like, you may add diced bell peppers as well.. Baru ada feel mexican sikit..

While waiting for the beef to brown a bit, you may prepare the sauce..


The Enchilada Sauce:


You could try to find the sauce in supermarket like Cold Storage, Jaya Supermarket etc, but it's really not that hard to make.. I followed this recipe loosely, using whatever I have in the kitchen.. So, my take on the recipe is something like below:

1/4 cup (or maybe less) vegetable oil - I used corn oil
2 tbsp butter
2 tbsp of flour (tepung gandum biasa je)
2 tbsp of chilli powder
1 can tomato soup
1 cup of hot water
1 chicken cube
Cayenne Pepper - ground
Smoked Paprika - ground
Garlic Powder
Salt to taste
Optional:
A dash of Hot sauce / Tobasco sauce
1 tbsp of tomato sauce

  1. Heat oil and butter.. Whisk in flour and chilli powder until they are beautifully incorporated..
  2. Add in tomato soup, hot water and chicken cube.. 
  3. Add in the remaining spices..
  4. I added tobasco sauce cuz I had some in the pantry.. If you don't have it, feel free to omit.. I even added in 1 tbsp of tomato sauce, just because I feel like it.. Heheh..

Now, the assembly.. You'll need:

Baking Dish
Cooked Minced Beef
Enchilada Sauce
Tortilla Bread - Beli yang brand Mission tu je.. most supermarkets sell them.. I used plain ones, but you can use garlic ke, apa ke, ikut suka
Cheese - I used mozarella and easy melt cheddar
Veges - I used sliced tomato and carrots cut into match sticks.. You may use zucchinis, bell peppers..


  1. First of, preheat oven to 180C.
  2. Then, take your baking dish and ladle in your sauce until the bottom is fully covered like the picture above.
  3. Take a piece of tortilla.. Put about 2 - 3 tbsp full of cooked minced beef in the middle.. Scatter some veges, pour in a 1/4 ladle of the sauce, and scatter some cheese.. See picture above for reference. 
  4. Roll. You can leave the ends open or tuck them nicely inside before rolling. As for me, I find it a lot easier leaving the ends open. 
  5. Place seam side down in the baking dish. Repeat with the rest of the tortilla..
  6. Once you're done, and the rolled tortillas have lined up snugly in your baking dish, pour in your remaining sauce.. Scatter cheese all over.. See picture below for example.
  7. Bake for about 30 minutes.. 
  8. Eat with a side of salad or sour cream.. Yummy..


Sorry, no picture of my baked enchilada. Well, it's basically just like the last picture, but with cheese melting all over. :) In a glance, the recipe seemed long and difficult.. But trust me, it's really not that hard.. You can even make it beforehand, and just pop it in the oven an hour before guests arrive.. Happy cooking dearies!

Toodles!


Thursday, January 24, 2013

Ice Cream DIY

So it turns out, I'm not such a bummer after all.. In fact, I made ice-cream a day earlier than planned.. I found another seemingly easy 'ice-cream-in-a-blender' recipe in MyResipi.. The steps are basically just about the same, but it uses less ingredients.. There's a saying, less is more.. Or is it really? Well, we'll just have to see if that's true.. 

Ingredients:

1 cup milk (I used full cream milk)
1 cup powdered creamer
1 tbsp of honey
1 tsp of vanilla essence

Crushed graham crackers / biscuits
Crushed macadamia nuts


Steps:
  1. Combine and blend everything in a blender until it is well mixed. 2 minutes should be enough, I guess..
  2. Put the mixture in a container and freeze.. Since I'm using a blender with many mugs, I just put the lid on and keep it straight into the freezer. I'm sure people won't notice of one missing mug..
  3. After about 2 hours or so (or before it truly freezes), take it out and blend it once again, but this time a bit longer.. For a smoother textured ice-cream, you can repeat this process a number of times. That is, if you are truly rajin to wait 2 hours & blend, and wait another 2 hours & blend.. I only did it twice.. Then I went to sleep.. The second time I put in crushed biscuits and nuts.. 
  4. Freeze overnight and enjoy the next morning.. 
Note: I kinda enjoyed using the magic bullet blender.. Although not in favour of the noise it made.. But it saves me from washing few utensils, had I used the normal blender.. Gotta love that.. :)


And here is the picture of my home made ice cream in the freezer.. Sorry I don't have a proper picture of the ice cream.. I went shopping and took the mug along.. So, no picture of it sitting nicely in an ice cream cone or cup.. But hey, talk about convenience, eh? You open your freezer, take your mug of yummy ice cream, grab a spoon on your way out and off you go.. You now have something nice to eat in the car.. Haha.. Tetibe semangat buat promo tak berbayar untuk blender ni pulak..

I must say, initially I was skeptical about this recipe, cuz I've actually tried making ice cream with no machine once before, but the result wasn't as I'd hope it'd be.. And I also thought the ice cream would melt rather easily.. Surprisingly, it holds up quite well.. And the texture is also as passable as a good ice cream.. So hey, this recipe sure is a keeper.. Altho I might try to tweak it a bit, for I do have certain issues with using the coffeemate creamer.. Looking for suitable subs.. Oh well, till we meet again..

Toodles dearies!


Wednesday, January 23, 2013

Yoghurt

I always have this tendency to buy an odd ingredient on impulse (you know, ingredients you're not too familiar with, or very rarely use), with full on spirit to cook something, usually recipes I saw on the net.. Say buttermilk, to cook crispy fried chicken.. Mana nak cari Buttermilk kat pasar, or kedai runcit, kena gak pergi Cold Storage.. So, odd la tu kan? Once I get home, I'd put that ingredient in a fridge, then after a few days, I'd wonder what was it that I wanted to cook in the first place.. It irks me a lot, especially when the expiration date is near.. But, I'd repeat the same thing again and again.. Now, I try not to buy those odd ingredients anymore.. Kurang sikit perasaan sakit jiwa.. I try to make it a practice, 'takde masalah, jangan sibuk nak cari masalah.'.. Or 'Do not put your head under the guillotine for a cause not worth fighting for'.. Hehe.. Gila panjang translation..

But yesterday, I did it again (bummer!).. Went to a mini market to buy something else, but as I walked by the cold storage section, I saw a tub of natural yoghurt.. I thought to myself, "Hey, I need this to cook that recipe I saw on the net." I just grabbed it on impulse.. At that point, I couldn't even remember what was it that I wanted to cook.. In my head, I was envisioning chicken.. Haha.. In the car, I rummaged through the 'files' in my brain, trying to remember WHAT was the recipe and whether I've saved it, and if I did, WHERE I saved it.. 'In my laptop? In the ipad? Did I print screen it? Did I save it in my pendrive? Or my hard disk? Or just the local Documents folder? Or did I just save it as Favorite? But which PC? Or was it my laptop?' 


That is actually quite a frustrating process, REALLY!.. Much like not remembering the name of a movie, or your long lost friend's name.. It frustrates you a lot, right? Yeah, same feeling here.. Andddd, on top of that, I'm quite sure that I wanted to use yoghurt as a substitute of an ingredient in the recipe.. Yeah, which makes matters worst.. :P Oh, by the way, I didn't even buy the thing that I originally wanted to buy.. Funny, right? Hurmm..

Well, after much brain rummaging and thinking (my face was like a permanent fixture of a frown the whole day, as if the problem was too great like memikirkan masalah negara), I now know what I wanted to cook it with - Baked Chicken Nuggets with Dilly Ranch Dip.. Go on, click the link and drool.. Yummeh, kan?

I also found other similar recipes, like below:
1) Jamie Oliver Crunchy Garlic Chicken Nuggets
2) Crispy Yogurt Chicken

Ok, being real, I might end up NOT cooking those recipes after all.. So, I've prepared a back up strategy.. Which is kind of ironic.. That very evening, I saw 'Anna Olson - Fresh' on TV and she showed the simplest way of using yoghurt.. Coincident? Maybe.. Miracle? Possibly.. A sign? Haha.. Well, could be.. Of what, I wonder?

Which reminds me, I can also incorporate natural yoghurt into my Fruit Salad, replacing mayonnaise.. A healthier choice, eh? Haha, suddenly ideas and inspirations come rushing in.. Oh well, Wish me luck! No wait, please wish the yoghurt the best of luck.. Hopefully it doesn't find its way into Mr Dumpster.. Huhu..

Aww, the boy is too cute, kan?

Toodles dearies.. Selamat Menyambut Maulidur Rasul.. Mari ke pasar membeli ayam.. Hehe..


Tuesday, January 22, 2013

No Ice Cream Machine Ice Cream

We have this set of Magic Bullet Blender at home.. Tapi entah brand apa I pun kurang pasti..  But the box states ASOTV - As Seen On TV.. Hehe.. Anyway, we rarely use it.. I hardly know why it was purchased in the first place.. Impulse buying, I guess.. Hihi.. (I didn't buy it, ye)..


Anyway, I was intrigued.. An idea came to mind.. I've heard of people making ice-creams without the machine, so I wanted to try it out using this blender.. So, as usual I googled online and found some interesting results:

How to make an ice cream without an ice-cream machine:
David Le Bovits     About.com   

From these two links, I can gather that all you need is a blender, or a food processor.. The magic bullet has many cups/mugs, so I guess I can save up some steps and utensils. I also stumbled upon a recipe which does not require a machine at all, like this recipe below I took from bbc website:


Vanilla Ice Cream
Vanilla ice cream
source : bbc.co.uk

This easy recipe for creamy vanilla ice cream doesn't require an in ice cream maker.
Ingredients:

2 vanilla pods

500 ml / 16 fl oz double cream

70 g / 3 oz sugar

3 egg yolks


Preparation method:
  1. Halve the vanilla pods length ways and scrape out the seeds. Add the pods to the cream and bring to the boil, then add the sugar and stir until the sugar has dissolved.
  2. Meanwhile, whisk the egg yolks in a large bowl then slowly whisk in the hot cream mixture.
  3. Pour the mixture through a fine sieve into another bowl and whisk in the vanilla seeds. Pour the mixture into a freezer-proof container and freeze for 2-3 hours, or until set.
Note: Due to the absence of milk in this recipe, the ice cream does not crystallise in the freezer bowl. So there's no need to stir it. Ideal for anyone without an ice cream maker.


Here's more recipes which I found yummy.. 
Recipes:

Savory Sweet Life - Easy Home Made Vanilla Ice Cream

Simply Recipes - French Vanilla Ice Cream Recipe*

MyRecipes - Peach and Toasted Pecan Ice Cream

Southern Living - 20 Best Recipes for Home Made Ice Cream


Thursday would be a public holiday here in Malaysia.. Hopefully I won't be too lazy to try this out.. :)

Toodles dearies!

Sunday, January 13, 2013

Project Revamp

Here's one project revamp.. Bought this simple pink long sleeved t-shirt quite some time ago, but I rarely wear it cuz the neckline is a bit low cut.. Wearing a spaghetti strap inside made me look extra fat, so that's certainly not helping.. Plus, wearing two layers of shirts in Malaysian humid weather proved to be a bit uncomfortable.. :P

It's a simple project, really.. Take another piece of shirt that matches, (in this case, I took my white tube), attach the 2 pieces together with pin, then sew.. Voila, problems solved..


If I still look like nangka after this, then I have an entirely different issue altogether.. One that needs proper diet and exercise.. Huhu.. 

Toodles!


Henry Bain's Burger Sauce

Looking for the ultimate burger sauce.. Stumbled upon this recipe at nibbledish and courier journal:

1) Nibbledish:

How to make Henry Bain's Burger
This recipe is all about the Henry Bain sauce.  Henry Bain was the head waiter at Louisville's elite Pendennis Club in the 1880's.  He developed this recipe, I have used the sauce for steaks, venison, duck, as well as burgers.


Ingredients:

1 grilled hamburger
1 toasted bun
Zuni Zuchinni pickles for garnish
for Henry Bain Sauce:
1/2 cup chili sauce
1/2 cup ketchup
1/2 cup A-1 steak sauce
1/2 cup worcestershire sauce
1 1/2 cup chutney-the original recipe used peach chutney, but any flavor will work.
2 Teaspoons salt
1/2 Teaspoon of freshly ground black pepper

Combine all the sauce ingredients in a sauce pan and bring to the boil.
Simmer over low heat for 5 minutes.
This keeps well in the refrigerator for several weeks.
Serve the sauce spooned over the burger with a side of Zuni Zuchinni Pickles.

2) Courier Journal
Henry Bain sauce is a sweet-sour-spicy beef sauce invented by a maitre d' at Louisville's all-male Pendennis Club in the early 20th century.

· 1 (17-ounce) jar Major Grey's chutney
· 1/2 of 9-ounce jar imported pickled walnuts (optional, see note)
· 1 (14-ounce) bottle ketchup
· 1 (11-ounce) bottle A-1 Steak Sauce
· 1 (10-ounce) bottle Worcestershire sauce
· 1 (12-ounce) bottle chili sauce
· Tabasco, to taste

Put the chutney and walnuts, if using, in a blender and chop fine or puree as you prefer (you'll need to stop and stir). Combine with other ingredients and season to taste with Tabasco.
Makes 4 pints.

Serve with hot or cold roast beef. Spread on beef sandwiches, serve with pot roast, etc. Also good served with cream cheese as a cracker spread.

Note: Pickled walnuts are recommended in the Henry Bain sauce recipe in``The Farmington Cookbook,'' but not in recipes written by former Louisville food writers Cissy Gregg and Marion Flexner.

************************************************************************************************************

Both claimed that it's a Henry Bain sauce recipe, tapi ada slight difference.. Would combine and give them a try lah.. 


Saturday, January 12, 2013

Project Revamp : Old T shirts

Was cleaning up the closet to free up some space. I actually gave away most of my clothes last year to here, but my closet is still full of clothes! I realize now that I don't have the heart to part with most of them due to a lot of reasons.. Memories, design hard to find nowadays, hoping to pass some of them to my children, hoping that I'd be able to wear them one day.. huhu.. I just can't stick to my friend's rule of 'If there is one item that you don't use within a year, throw it away'. The thing is, I haven't worn these clothes for a lot of years.. So, how leh? :P

I have like 3 piles of t-shirts that I have not worn since uni life.. And uni life was years back.. I am thinking of revamping them.. Maybe that would help freeing up space in my closet. I googled online and saw these potentials.. 


1) Shrug t-shirt

2) t-shirt quilt/ blanket
t shirt blanket

3) Grocery Bag
T-shirt Grocery Bags

4) A wall art

5) As a gift wrap?

 
source : make-it-love-it

6) A cloth diaper?
source : magical-mama

There are  also a lot of ideas, inclusive of tutorial that one can get from pinterest.

Supercool, eh? But somehow, I couldn't help but wonder.. Where do I keep these things, if I ever decide to make them? Erkk..

Cheerios!


Happy New Year


Hello blog..

I'm sorry I have neglected you for soo long.. *sheepish smile*

A lot has happened, both happy and sad events, and sometimes confusing too.. That's just part of life, I guess.. One day, Insya Allah, I'd be able to look back and say, 'I've been there, felt that, done that, experienced that'.. Hopefully these things will help me become a better person..

Anyways, it's a new Gregorian year, 2013.. I imagine a lot more will happen this year.. Renewed hope, renewed dreams, renewed resolution.. with new fears, new challenges, new responsibilities.. Whatever it is, I believe Allah will always be there with me to guide and for me to turn to.. In which therefore, I pray that I shall never falter away from Him.. His blessings is just everywhere.. Thank you Allah..

Happy new Gregorian year.. Hope everyone will achieve whatever it is they want to achieve.. And I also hope that we don't forget the unfortunate, and don't forget to be thankful.. :)

Cheerios!