Pages

Showing posts with label Recipe. Show all posts

Monday, February 3, 2014

My Ultimate Burger!


Ahh.. You just can't go wrong when you have burgers topped with lotsa cheese and crispy onion ring, can ya? haha.. Well, this is our ULTIMATE HOMEMADE BEEF BURGER.. Well, ultimate according to us laa.. kalau orang lain, tak tahu la pula.. These patties are tender and juicy and succulent. So, today, I am gonna put up the recipe for these delectable, (though maybe not THAT appealing to the eyes), yummylicious homemade pattties which is the main and important thing when making burgers.. So, here goes..

HOMEMADE BEEF PATTIES
Bahan-bahan:
1 kg daging cincang
2 biji bawang holland / bawang bombay - didaduk kecil
lada hitam
jintan manis
jintan putih
ketumbar
serbuk paprika
dried oregano
kicap manis
sos worchestershire
breadcrumbs
1 biji telur
sedikit tepung jagung


Cara-caranya:
  1. Lada hitam, jintan manis, jintan putih dan ketumbar disangai kering atas api kecil kemudian ditumbuk halus. Lebih mudah dan cepat jika ada grinder. Sukatan agak-agak la ye.. Mungkin boleh cuba dalam setengah sudu besar bagi setiap rempah. Boleh juga kalau nak pakai yang siap serbuk tapi kurang sedap laa..
  2. Masukkan semua bahan termasuk rempah ratus yang ditumbuk halus tadi. Gaul sehingga semua bahan mesra dan sebati. Bentukkan menjadi beef patties.
  3. Sebaiknya disimpan di dalam peti sejuk lebih kurang 15 - 30 minit sebelum dimasak. Boleh juga disejukbekukan untuk dijadikan stok.

These link, link and link here provide articles on what you should and shouldn't do to get good burgers.. Well, my 2-cents advice would be to use them as a guideline, but hey.. whatever works for you and your family, should be A-ok.. For example, I would imagine 80-20 lean meat/fat ratio would give a tremendous, juicy and succulent result for your burgers.. But I figure if you cook them right, you'd get magnificent burgers with some cheap lean meat as well.. Kebiasaannya saya ke pasar, beli daging pejal dan minta untuk dimesin.. No fat la kan.. So, I know my meat has got no 'funny' stuff added to them since they're being minced right in front of me..  

I think what makes these burgers juicy and tender is the fact that I cooked them in pre-made sauce. Haha, kire menipu la eh? To be honest, I m not very proud of the sauce cuz it's not exactly made of natural ingredients. Still trying to concoct a decent sauce made of natural ingredients. For now, the recipe below would have to suffice..

SOS BEEFBURGER
Bahan-bahannya:
Sos cili
sos tomato
kicap
madu
serbuk lada hitam

Cara-caranya:
Campurkan semua bahan di dalam mangkuk. Boleh dimasak atas api kecil jika mahu, tapi bukanlah satu kemestian.

Tip: Semasa burger separuh masak, tuangkan sos. Jadi, ada ruang dan masa untuk burger menyerap sos. Hehe, makes sense ke? Oh well, this works for me, for now..

Happy trying darls!

Toodles! 


Sunday, January 19, 2014

Banana and Oats Pancake

Hallo..

Title tak mengagak, nak nama glemer je.. Walhal orang kampung panggil lempeng pisang je.. Hehe.. This was yesterday's breakfast. Alkisah, ada banyak pisang yang masak ranum.. Rezeki, jiran yang baik hati bagi.. Hajat di hati nak goreng, buat minum petang, tapi asyiklah terlupa.. Sedar-sedar, dah nak lembik dah pisang tu.. Kalau dibiar lama, masuk tong juga nanti.. Kasihan pula, lagipun tak baik buang rezeki orang bagi..

Fikir punya fikir, akhirnya mendapat inspirasi untuk membuat lempeng.. So, sajalah google resepi tu, eh ada pulak keluar result lempeng pisang oats.. Wah, ini sudah bagus.. Oats pun ada banyak lagi dalam pantry.. Hehe, I don't know about you guys out there but I always have this tendency to buy oats dengan harapan nak tukar gaya hidup.. Konon breakfast dengan oats, hidup sihat bla bla bla.... Beli tak mengagak pulak tu, paket besar terus.. Dapat 2-3 kali makan oats pepagi, semangat hidup sihat pun mulai kelam dan pudar, maka oats tersimpan kemas dan rapi je dalam pantry.. Haha.. So, when one finds a recipe to use up the oats, one eagerly jumps on the idea of trying it out..

So, here goes.. Recipe is from the famous food blogger, CMGebu of DTS.. Dia pun ambil dan olah resepi ni dari orang lain.. I pulak derhaka lagi pada resepi yang telah diderhakakan.. Memang layak dibuang negeri.. Haha.. So, ini versi double derhaka, guna apa yang ada di dapur aje..


BANANA & OATS PANCAKE

Ingredients:
250 gms ripe bananas, mashed
200 ml fresh milk
1 cup quaker oats
2-3 tbsp self-raising flour
1-2 tbsp brown sugar, *optional
a pinch of salt
A bit of butter

Steps:
  1. Combine all ingredients except butter. Taste for salt.
  2. Put it aside and let it rest for about 5 minutes so that the batter would thicken up just a bit.
  3. Heat a non-stick pan on medium high heat and just dribble with some butter, or you can just take a clean paper towel, dip in a bit of good vegetable oil and just slightly oil the pan. Or, you can just spray the pan with one of those oil-in-aerosol can-thingy.
  4. Ladle in the batter into the pan. You might want to level it with a spatula or spoon cuz the batter is kinda sticky. So, about 2-3 minutes on the first side, flip it and another minute or so on the other side. Well, basically you just want to make sure your pancake is well cooked.
  5. Repeat step 3 & 4 for the remaining batter.
  6. Serve with butter and maple syrup or honey if desired. A dollop of nutella would be a nice companion too.. Best served warm.
A healthy, delicious meal in the morning.. Happy cooking!

Toodles!

Tuesday, May 7, 2013

Chicken Nuggets

Hello dearies,

Remember I was rambling on and on about yoghurt few months back? Hehe.. So, I kept a few entries that I forgot to publish regarding how I use the yoghurt.. Here's one recipe that I cooked using that very ingredient, chicken nuggets. It's really quite easy to make.. The picture below is the baked version.. I also fried some in shallow vegetable oil.. Sorry, no picture on the fried version though.. Personally, I prefer the fried ones.. But of course, I suppose the baked ones are a  lot healthier.. hehe..


I modified the recipes techniques I posted in this entry. Here's how I cook my Chicken Nuggets..

The marinade & the dip..
1 chicken breast - fillet and cubed
Salt
1 cup cup plain yogurt
1 cup mayonnaise
1 garlic - grated finely like garlic paste
1/3 grated parmesan cheese

  1. Fillet and cut your chicken into small bite sized cubes/pieces.
  2. Lightly sprinkle some salt.
  3. Combine yogurt, mayonnaise and garlic in a bowl. Divide the mixture by half. Add in grated parmesan in one bowl/container. Keep that one in the fridge.
  4. Dunk your chicken pieces into the other half of yogurt mixture (the one without parmesan in it). Let sit in the fridge for a minimum of 1 hour. 

When it's time to cook the nuggets, take 3 shallow dishes out. I just used 2 flat plates and a shallow bowl.. 

In the first plate (Plate A), I put in these ingredients:
1 cup all purpose flour /tepung gandum
A dash of paprika
A dash of oregano powder

And in the shallow bowl (Bowl B),
2 eggs
Salt
Pepper

Lastly, in the second plate (Plate C), I put in:
1 cup breadcrumbs - baked for about 5 minutes
1/3 cup grated Parmesan cheese
A few dashes of garlic powder


Directions:

  1. Preheat oven to 180C. Spread breadcrumbs in a baking dish and bake until golden, around 5 minutes or so.
  2. Combine all ingredients in plate A, Bowl B, Plate C accordingly.
  3. The following steps are a bit messy, so you might want to do one step at a time, or one batch at a time.. First, coat the chicken in Plate A, the flavoured flour, then dip in Bowl B, the eggs and lastly transfer to Plate C to coat them evenly in the flavoured breadcrumbs.
  4. If you want to bake these delicious goodies, just arrange them nicely on a lightly oiled wire rack (set it inside the same baking dish you use to bake the breadcrumbs). Bake until chicken is thoroughly cooked, for about 12 - 15 minutes. Or you could just spread more bread crumbs inside the dish and arrange them nicely to bake. If you want to fry them, you have the option of using small amount of vegetable oil or deep fry them, your choice.
  5. Serve hot out of the oven with your homemade dip. You may sprinkle with some salt and pepper if you like.
Note: You might want to put a small blob of butter on each nugget for that golden effect. I didn't, hence the pale color. :)

So yeah, not too hard to make, aye? Gotta love simple food like these. The dip/marinade can be made ahead of time. It should hold well in the fridge for about a week. Happy cooking.. 

Toodles!


Friday, February 8, 2013

Enchilada

Last Sunday, I woke up wanting to cook lasagne.. But a few key ingredients were missing and I was soo lazy to go to the market.. Inspiration struck, so I changed plan.. I did Mexican fusion food instead.. Enchilada.. Mexicans love their chillies.. So do us Malaysians.. Mexicans have Habanero, Ancho Chillies, Chipotle, Jalapeno, just to name a few.. Malaysians love their bird's eye chillies or cili api.. small but fiesty.. yum!

But this dish I made wasn't exactly fire-y hot.. I mean, not everyone can take a lot of heat.. So, I went a bit mild, using whatever I have in the kitchen.. So, here's my fusion recipe, with some pics.. Enjoy..

For the beef, I basically combined the recipes and techniques from this blog, plus '30 Minutes Meal' cooking show that I watched over Food Network Asia on Astro just recently (The name of the chef is Rachel something if not mistaken).. Anyway, I ended up cooking it this way..

The Minced Beef:


Ingredients:
Olive Oil
1 kilo minced beef
1 1/2 green onion (or bawang bombay)
Smoked Paprika
Serbuk jintan putih (OK tipu... sebab malas nak tumbuk/blend, taruk je dalam keadaan asal.. konon it'll give some bite.. haha)
Serbuk ketumbar
Black Pepper
Garlic Powder
Salt


*The amount of spices is based on pure instinct.. You know, a dash of this, a dash of that.. So, trust your instinct, use your nose, your eyes, your tongue untuk merasa makanan yang anda masak..

  1. Heat oil, pour in minced meat.. 
  2. Fry on medium heat.. Add in onions and the spices..
  3. Stir just occasionally.. Bukannya masak rendang, nak kena kacau selalu.. 
  4. When it looks brown and delicious.. Add in some salt..
  5. Do the taste test... Grab a spoon and makan..
  6. Kalau sedap, then it's done.. Kalau tawar, tambah garam.. Kalau kurang pedas, tambah paprika.. Kalau terover masin / pedas.. Hurm, pasrah je la kot.. hehe..

Note 1: What I would do differently is perhaps tumis bawang sampai agak2 layu then add in cili blender.. Tumis sampai wangi.. Then add in minced beef.. hehe.. Kalau dah tekak Melayu tu kan.. Mesti nak cili dulu, kini dan selamanya.. Hehe...
Note 2: If you like, you may add diced bell peppers as well.. Baru ada feel mexican sikit..

While waiting for the beef to brown a bit, you may prepare the sauce..


The Enchilada Sauce:


You could try to find the sauce in supermarket like Cold Storage, Jaya Supermarket etc, but it's really not that hard to make.. I followed this recipe loosely, using whatever I have in the kitchen.. So, my take on the recipe is something like below:

1/4 cup (or maybe less) vegetable oil - I used corn oil
2 tbsp butter
2 tbsp of flour (tepung gandum biasa je)
2 tbsp of chilli powder
1 can tomato soup
1 cup of hot water
1 chicken cube
Cayenne Pepper - ground
Smoked Paprika - ground
Garlic Powder
Salt to taste
Optional:
A dash of Hot sauce / Tobasco sauce
1 tbsp of tomato sauce

  1. Heat oil and butter.. Whisk in flour and chilli powder until they are beautifully incorporated..
  2. Add in tomato soup, hot water and chicken cube.. 
  3. Add in the remaining spices..
  4. I added tobasco sauce cuz I had some in the pantry.. If you don't have it, feel free to omit.. I even added in 1 tbsp of tomato sauce, just because I feel like it.. Heheh..

Now, the assembly.. You'll need:

Baking Dish
Cooked Minced Beef
Enchilada Sauce
Tortilla Bread - Beli yang brand Mission tu je.. most supermarkets sell them.. I used plain ones, but you can use garlic ke, apa ke, ikut suka
Cheese - I used mozarella and easy melt cheddar
Veges - I used sliced tomato and carrots cut into match sticks.. You may use zucchinis, bell peppers..


  1. First of, preheat oven to 180C.
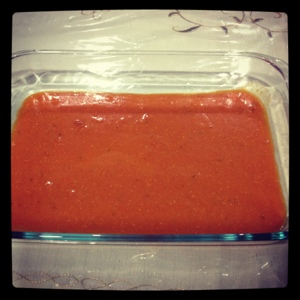
  2. Then, take your baking dish and ladle in your sauce until the bottom is fully covered like the picture above.
  3. Take a piece of tortilla.. Put about 2 - 3 tbsp full of cooked minced beef in the middle.. Scatter some veges, pour in a 1/4 ladle of the sauce, and scatter some cheese.. See picture above for reference. 
  4. Roll. You can leave the ends open or tuck them nicely inside before rolling. As for me, I find it a lot easier leaving the ends open. 
  5. Place seam side down in the baking dish. Repeat with the rest of the tortilla..
  6. Once you're done, and the rolled tortillas have lined up snugly in your baking dish, pour in your remaining sauce.. Scatter cheese all over.. See picture below for example.
  7. Bake for about 30 minutes.. 
  8. Eat with a side of salad or sour cream.. Yummy..


Sorry, no picture of my baked enchilada. Well, it's basically just like the last picture, but with cheese melting all over. :) In a glance, the recipe seemed long and difficult.. But trust me, it's really not that hard.. You can even make it beforehand, and just pop it in the oven an hour before guests arrive.. Happy cooking dearies!

Toodles!


Thursday, January 24, 2013

Ice Cream DIY

So it turns out, I'm not such a bummer after all.. In fact, I made ice-cream a day earlier than planned.. I found another seemingly easy 'ice-cream-in-a-blender' recipe in MyResipi.. The steps are basically just about the same, but it uses less ingredients.. There's a saying, less is more.. Or is it really? Well, we'll just have to see if that's true.. 

Ingredients:

1 cup milk (I used full cream milk)
1 cup powdered creamer
1 tbsp of honey
1 tsp of vanilla essence

Crushed graham crackers / biscuits
Crushed macadamia nuts


Steps:
  1. Combine and blend everything in a blender until it is well mixed. 2 minutes should be enough, I guess..
  2. Put the mixture in a container and freeze.. Since I'm using a blender with many mugs, I just put the lid on and keep it straight into the freezer. I'm sure people won't notice of one missing mug..
  3. After about 2 hours or so (or before it truly freezes), take it out and blend it once again, but this time a bit longer.. For a smoother textured ice-cream, you can repeat this process a number of times. That is, if you are truly rajin to wait 2 hours & blend, and wait another 2 hours & blend.. I only did it twice.. Then I went to sleep.. The second time I put in crushed biscuits and nuts.. 
  4. Freeze overnight and enjoy the next morning.. 
Note: I kinda enjoyed using the magic bullet blender.. Although not in favour of the noise it made.. But it saves me from washing few utensils, had I used the normal blender.. Gotta love that.. :)


And here is the picture of my home made ice cream in the freezer.. Sorry I don't have a proper picture of the ice cream.. I went shopping and took the mug along.. So, no picture of it sitting nicely in an ice cream cone or cup.. But hey, talk about convenience, eh? You open your freezer, take your mug of yummy ice cream, grab a spoon on your way out and off you go.. You now have something nice to eat in the car.. Haha.. Tetibe semangat buat promo tak berbayar untuk blender ni pulak..

I must say, initially I was skeptical about this recipe, cuz I've actually tried making ice cream with no machine once before, but the result wasn't as I'd hope it'd be.. And I also thought the ice cream would melt rather easily.. Surprisingly, it holds up quite well.. And the texture is also as passable as a good ice cream.. So hey, this recipe sure is a keeper.. Altho I might try to tweak it a bit, for I do have certain issues with using the coffeemate creamer.. Looking for suitable subs.. Oh well, till we meet again..

Toodles dearies!


Wednesday, January 23, 2013

Yoghurt

I always have this tendency to buy an odd ingredient on impulse (you know, ingredients you're not too familiar with, or very rarely use), with full on spirit to cook something, usually recipes I saw on the net.. Say buttermilk, to cook crispy fried chicken.. Mana nak cari Buttermilk kat pasar, or kedai runcit, kena gak pergi Cold Storage.. So, odd la tu kan? Once I get home, I'd put that ingredient in a fridge, then after a few days, I'd wonder what was it that I wanted to cook in the first place.. It irks me a lot, especially when the expiration date is near.. But, I'd repeat the same thing again and again.. Now, I try not to buy those odd ingredients anymore.. Kurang sikit perasaan sakit jiwa.. I try to make it a practice, 'takde masalah, jangan sibuk nak cari masalah.'.. Or 'Do not put your head under the guillotine for a cause not worth fighting for'.. Hehe.. Gila panjang translation..

But yesterday, I did it again (bummer!).. Went to a mini market to buy something else, but as I walked by the cold storage section, I saw a tub of natural yoghurt.. I thought to myself, "Hey, I need this to cook that recipe I saw on the net." I just grabbed it on impulse.. At that point, I couldn't even remember what was it that I wanted to cook.. In my head, I was envisioning chicken.. Haha.. In the car, I rummaged through the 'files' in my brain, trying to remember WHAT was the recipe and whether I've saved it, and if I did, WHERE I saved it.. 'In my laptop? In the ipad? Did I print screen it? Did I save it in my pendrive? Or my hard disk? Or just the local Documents folder? Or did I just save it as Favorite? But which PC? Or was it my laptop?' 


That is actually quite a frustrating process, REALLY!.. Much like not remembering the name of a movie, or your long lost friend's name.. It frustrates you a lot, right? Yeah, same feeling here.. Andddd, on top of that, I'm quite sure that I wanted to use yoghurt as a substitute of an ingredient in the recipe.. Yeah, which makes matters worst.. :P Oh, by the way, I didn't even buy the thing that I originally wanted to buy.. Funny, right? Hurmm..

Well, after much brain rummaging and thinking (my face was like a permanent fixture of a frown the whole day, as if the problem was too great like memikirkan masalah negara), I now know what I wanted to cook it with - Baked Chicken Nuggets with Dilly Ranch Dip.. Go on, click the link and drool.. Yummeh, kan?

I also found other similar recipes, like below:
1) Jamie Oliver Crunchy Garlic Chicken Nuggets
2) Crispy Yogurt Chicken

Ok, being real, I might end up NOT cooking those recipes after all.. So, I've prepared a back up strategy.. Which is kind of ironic.. That very evening, I saw 'Anna Olson - Fresh' on TV and she showed the simplest way of using yoghurt.. Coincident? Maybe.. Miracle? Possibly.. A sign? Haha.. Well, could be.. Of what, I wonder?

Which reminds me, I can also incorporate natural yoghurt into my Fruit Salad, replacing mayonnaise.. A healthier choice, eh? Haha, suddenly ideas and inspirations come rushing in.. Oh well, Wish me luck! No wait, please wish the yoghurt the best of luck.. Hopefully it doesn't find its way into Mr Dumpster.. Huhu..

Aww, the boy is too cute, kan?

Toodles dearies.. Selamat Menyambut Maulidur Rasul.. Mari ke pasar membeli ayam.. Hehe..


Sunday, January 13, 2013

Henry Bain's Burger Sauce

Looking for the ultimate burger sauce.. Stumbled upon this recipe at nibbledish and courier journal:

1) Nibbledish:

How to make Henry Bain's Burger
This recipe is all about the Henry Bain sauce.  Henry Bain was the head waiter at Louisville's elite Pendennis Club in the 1880's.  He developed this recipe, I have used the sauce for steaks, venison, duck, as well as burgers.


Ingredients:

1 grilled hamburger
1 toasted bun
Zuni Zuchinni pickles for garnish
for Henry Bain Sauce:
1/2 cup chili sauce
1/2 cup ketchup
1/2 cup A-1 steak sauce
1/2 cup worcestershire sauce
1 1/2 cup chutney-the original recipe used peach chutney, but any flavor will work.
2 Teaspoons salt
1/2 Teaspoon of freshly ground black pepper

Combine all the sauce ingredients in a sauce pan and bring to the boil.
Simmer over low heat for 5 minutes.
This keeps well in the refrigerator for several weeks.
Serve the sauce spooned over the burger with a side of Zuni Zuchinni Pickles.

2) Courier Journal
Henry Bain sauce is a sweet-sour-spicy beef sauce invented by a maitre d' at Louisville's all-male Pendennis Club in the early 20th century.

· 1 (17-ounce) jar Major Grey's chutney
· 1/2 of 9-ounce jar imported pickled walnuts (optional, see note)
· 1 (14-ounce) bottle ketchup
· 1 (11-ounce) bottle A-1 Steak Sauce
· 1 (10-ounce) bottle Worcestershire sauce
· 1 (12-ounce) bottle chili sauce
· Tabasco, to taste

Put the chutney and walnuts, if using, in a blender and chop fine or puree as you prefer (you'll need to stop and stir). Combine with other ingredients and season to taste with Tabasco.
Makes 4 pints.

Serve with hot or cold roast beef. Spread on beef sandwiches, serve with pot roast, etc. Also good served with cream cheese as a cracker spread.

Note: Pickled walnuts are recommended in the Henry Bain sauce recipe in``The Farmington Cookbook,'' but not in recipes written by former Louisville food writers Cissy Gregg and Marion Flexner.

************************************************************************************************************

Both claimed that it's a Henry Bain sauce recipe, tapi ada slight difference.. Would combine and give them a try lah.. 


Monday, February 20, 2012

:: Carrot Cake Recipe ::

I have 2 carrot cake recipes at home.. They sit in one Word document.. Each time I want to bake a carrot cake, I would go all confused as to which recipe is a good recipe.. They say never tweak a baking recipe.. But I always do.. Due to the above-mentioned confusion, I’d always mix the two recipes together, cutting down and adding up ingredients according to my heart’s desire.. So, I’d end up getting different result of carrot cake each time.. Oh, don’t worry, the cakes were edible every-time though.. :P

I figure, it’s time to look for the ONE carrot cake recipe that I should always stick to.. This particular carrot cake from allrecipe got great reviews.. I can’t wait to try em out..


Ingredients

• 4 eggs
• 1 1/4 cups vegetable oil
• 2 cups white sugar
• 2 teaspoons vanilla extract
• 2 cups all-purpose flour
• 2 teaspoons baking soda
• 2 teaspoons baking powder
• 1/2 teaspoon salt
• 2 teaspoons ground cinnamon
• 3 cups grated carrots
• 1 cup chopped pecans


• 1/2 cup butter, softened
• 8 ounces cream cheese, softened
• 4 cups confectioners' sugar
• 1 teaspoon vanilla extract
• 1 cup chopped pecans


Directions
1. Preheat oven to 350 degrees F (175 degrees C). Grease and flour a 9x13 inch pan.

2. In a large bowl, beat together eggs, oil, white sugar and 2 teaspoons vanilla. Mix in flour, baking soda, baking powder, salt and cinnamon. Stir in carrots. Fold in pecans. Pour into prepared pan.

3. Bake in the preheated oven for 40 to 50 minutes, or until a toothpick inserted into the center of the cake comes out clean. Let cool in pan for 10 minutes, then turn out onto a wire rack and cool completely.

4. To Make Frosting: In a medium bowl, combine butter, cream cheese, confectioners' sugar and 1 teaspoon vanilla. Beat until the mixture is smooth and creamy. Stir in chopped pecans. Frost the cooled cake.


Here are some reviews:

CYNJAMS:
This is a great recipe. Some other reviewers had problems with the center falling-these tips may help. Cakes will sink or fall because of the following 1.Overbeating-too much air is incorporated 2.Underbaking- oven temp is too low or too short a baking time 3.Over or under measurement of ingredients 4.Using too small/large of baking pan 5. Make sure your oven temp is correct-preheat for at least 30 min. and check to make sure your oven is heating properly by using an oven thermometer for accuracy and finally, only open your oven door if you have to and then make sure 3/4 of the cooking time is up. Happy baking everyone!

Gneebeanie:

After reading through 4-5 pages of the reviews, I consolidated the most referred alterations to this recipe to: 1) using 1 cup brown sugar and 1 cup white sugar 2) adding an extra teaspoon of vanilla extract 3) adding 1 8oz. can of crushed pineapple (I squeezed out most of the juice before adding it, I didn't want any extra fluids in the cake) 4) Added 1/4 teaspoon of nutmeg 5) added 1 extra teaspoon of cinnamon 6) used 3/4 cup canola oil and 1/2 cup applesauce. The result came out incredibly delicious - the cake was very flavorful and moist. For the frosting, I only used 3.5 cups of powdered sugar, and it was more than sweet enough, with a nicely balanced cream cheese vs. sweet flavor. If I would change anything again, I would use less pecans - it's a bit too nutty for my personal tastes. Also, I followed another reviewer's suggestion of grating the carrots with the large grater side (the one you use for cheese) so that you don't end up with a bunch of carrot mush and juice that can't be used. Will definitely make again! This is probably the best carrot cake I've ever had.

Emily Trak:

I made some subs: 1.5 cups brown sugar (no white), half cup oil and 1 cup crushed pineapple (drained) instead of 1 1/4 cup oil, 2.5 tsp cinnamon and 1/4 tsp nutmeg, 3 tsp vanilla, omitted nuts and frosting. I baked in two 9 inch round cakepans for 40 minutes instead of a 9x13 pan. The result was perfectly moist cake with terrific flavor, and less guilt! Next time, I'll double the recipe so my cakes can be a bit taller, and I'll add crushed walnuts...but I can't imagine it being much better than this. Suggestion: if you're using a box grater, grate the carrots on the 2nd largest holes (same ones you use to grate cheese). I made the mistake of grating on the next smaller size holes last time, and used 5 cups of carrots (and 1/2 cup oil - no applesauce). The carrot shreds were too small and too many, and a lot of carrot juice was produced. All that extra liquid caused my "cake" to be more like a thin layer of rubbery pumpkin pie filling, even after cooking for over an hour. So make sure your carrot shreds are quite large, so you don't end up with all that unwanted carrot juice.
AZ_Melanie:

I made this cake for my son's first birthday party a few days ago and it was a hit!!! I too, made a few changes that really made this cake great. I used 3/4 cup oil plus 1/2 cup applesauce instead of the full amount of oil, I used 1 cup each white and brown sugar and also added 1/4 teaspoon nutmeg. As for the frosting, I reduced the powdered sugar to 2 1/4 cups. This recipe was delicious and I am sure would be with or without any of the changes mentioned above. In fact, I think I am going to go eat another leftover piece right now :)!! Thanks Tammy!

I'll make my own personal review once I've tried the recipe.. :)

Till next we meet.. Toodles! :)


Wednesday, February 8, 2012

:: California Mixed Salad ::

I am not really a big fan of salads.. Except for fruit salad.. Macam yang kat bawah tuu.. Hehe.. But on a trip to Singapore last year, I had the pleasure of eating a delicious salad at the Coffee Bean & Tea Leaf.. Upon returning to Malaysia however, I could not seem to find that particular salad in any of the CBTL outlets here.. Apparently, they don't serve the same salad.. :(

I could not even remember the name of the salad, so I tried to google the recipe by recalling some of the ingredients inside.. Googling blindly proved to be, err.. difficult.. Found a few that I thought was almost close, tapi malas la pulakk nak buat.. takut tak jadi, so nanti kecewa.. Bila kecewa, nanti putus harapan.. Bila putus harapan, nanti akan say no to salad forever and ever.. lepas tuh nanti badan tak cukup vitamin sebab tak makan sayur-saturan.. see, it has ripple effect.. so baik jangan buat.. haha.. alasan!

Anyway, just recently, I went to Singapore again for another trip.. Haruslah singgah CBTL kan.. The name of the salad: California Mixed Salad.. So, tulis entry cepat2 supaya tak lupa lagi.. These were the ingredients I saw inside:

Salad Leaves
Cherry Tomatoes
Cranberry @ Craisin
Sliced Almonds
Vinaigrette

I vaguely remembered that the one I had on the first trip had more variety of leafy leaves, some sprinkles of mild tasting cheese and two sticks of bread.. The one I had at the CBTL Changi airport kali nih takde pon.. Tak baik kan tipu orang? Tsk Tsk.. So how does this salad that wowed me and had me googling the net like most girls would do to look for what fashion is IN this season? See below..

|

|

|

|

|

|

|

|

|

|

|
V

|

|

|

|

|

|

|

|

|

|
V

tah hape2 nak tunjuk gambar salad pun nak buat saspen.. heh, fine, tengok je laa..


taraaa!!
CBTL California Mixed Salad @ Changi Airport.. Ingredients kurang, tapi sedap jugak..

Hahaha.. takdelah semenggah mana, kan? Tapi serius sedap o0oo.. Mum loved it too..

So, I googled the recipe (again), hunting for the vinaigrette recipe to be exact.. Some has avocado inside the salad, and some has their dressing with mayonnaise.. walhal the one I had macam tak creamy pun? Sort of like a clear, fruity vinaigrette.. I found two recipes (1 tastebook  , 2 foodnetwork) that seem almost close (according to my not so logic mind).. This recipe seems yummy too.. Will give #1 a try, kalau tiba2 datang mood rajin laa.. hehe.. (kenapa bila dah jumpa resepi tuh terus jadik pemalas?)

Toodles everyone.. Happy munching!


:: Lolly's Fruit Salad ::


Bongkar khazanah lama, jumpa gambar nih.. gigih edit pakai photoscape... walhal tak cantik pun editnya! haha

Would like to share my favourite fruit salad recipe.. A great hit during family gatherings..

Ingredients:

Fruits: You have the option to use some or all of these fruits:
Apples (Green, Red), Strawberries (or any berries you like), Mangoes, Oranges, Seedless Grapes (Green, Red), Plums, Pears, Watermelon, Dates

Dressing:
Mayonnaise, Fresh Cracked Black pepper, Honey, Lemon juice, Lemon zest, Salt

Method:

  1. Cut the fruits into bite-sized cubes. Squeeze in some lemon juice to keep them from discoloring and toss them about in a bowl.
  2. Using that same bowl, stir in mayonnaise, fresh cracked black pepper, honey, lemon juice, lemon zest and a pinch of salt. Taste to adjust to your liking.. 
  3. This salad is best served cold, so you might want to keep them in the fridge before serving.

Footnote:
1. I sometimes have my fruit salad sprinkled with some crushed pralines or walnuts or almonds.
2. A friend suggests adding in cinnamon powder for smell. Hmm, I guess you could also add nutmegs which would serve as the same function. Never tried it tho.. 

Happy munching! Toodles!

Note:
1. Click here for Fruits Hints and Tips..

Friday, January 13, 2012

:: Cold Chicken Sandwich ::


Recipe:
Cold Roasted Chicken - diced, or shredded
Salt n Pepper
Mayonnaise
Tomatoes - Diced or sliced
Iceberg Lettuce or Salad
Cheddar Cheese
Bread

1. Dice chicken, prepare vegetables.
2. Mix the diced / shredded cold roasted chicken with mayonnaise, salt and pepper.
3. Spread bread with mayo.
4. Arrange veges, chicken and cheese on your bread.
5. Enjoy!

Quick, easy and yummy..

I love!

Toodles!


Tuesday, November 29, 2011

Puding Karamel

Found this video by chance..


Had to give it a try.. So, I did.. And here's my result:

Divine!

Dah, tak payah berdukacita sebab pakcik yang jual good caramel pudding tu dah tak menjual di PaRam masa bulan puasa.. Sebab I dah pandai buat dah.. :P

Thanks Francis.. Or rather, Auntie yang jaga Francis.. Heh..

Toodles!


Monday, November 28, 2011

:: Devil's Chocolate Cake ::

One of my BFF, Fahn got a surprised birthday cake from her friend at work. The name of the cake - Devil's Chocolate Cake. Few days later, she ordered the same cake from her friend just becuz she felt like eating. This was her what she ordered..

Fahn's Cake

That looks ah-may-zingggg, is it not?.. Obviously I had to try it out.. Fahn gave me this link to look for the recipe, I gave it a go and this was the result..

Messy lah sikit ye.. Hehe.. Suka hati letak blueberries bersepah-sepah.. Ganache pun runny jek.. 

Mind you, this cake was hand-beaten, ok.. *Clap clap.. 


Err.. Please excuse the messiness.. It's still in the fridge, have yet to try it out.. Will be doing just that right after this.. Have a nice day, everyone..

Toodles!


Saturday, July 23, 2011

:: Gorgeous Golden Nuggets ::

ehem.. hola beautiful people.. kembali bersiaran setelah lamaaa menghilang.. :P


Today I made a bunch of yummy mini granola bars.. perhaps I should call them granola nuggets.. have been procrastinating on making these yummies for quite some time.. petang tadi pergi kedai bakery supply shop and finally found the golden chocolate wrapper that i've searched high and low for.. the ingredients mmg dah ada, resepi pun dah tampal kat fridge, so apa lagi.. makmal ujicuba dibuka semula! (actually nak buat jugak-jugak sebab teruja jumpa chocolate wrapper. :P)


the recipe was google searched.. obviously, lazy misz.lolly would always look for a recipe that's the easiest to make with very minimal ingredients, if possible ones that are always available in mum's kitchen.. I even modified some steps to make life easier..

original recipe can be found here..

while my modified recipe goes something like this:

2 cups oats
sunflower seeds
walnuts, crushed
brown sugar
honey
butter
vanilla extract
salt
chocolate chips

Note: For 2 cups of oats, you'd get about 30 - 35 nuggets. I only put the measurement for the oats cuz i only used basic instincts (hehe) when adding the rest of the ingredients into the oats. You can always refer the original recipe for measurement reference.

  1. First of, you need a non-stick pan. Throw oats, nuts and nuts into the pan, and on a low heat, use a wooden spatula to stir them well. Get them off the heat before they all burn and set them aside in a bowl.
  2. Next, you want to prepare a concoction that'll make the nuts stick to each other. Pour in the brown sugar, honey, butter and salt into the same pan that you use to toast the nuts. Stir on a low heat until everything melts in ooey goodness.
  3. Turn off the heat, add in some vanilla extract for that oh-so-wonderful smell.
  4. Meanwhile, add in some chocolate chips into the nuts, stirring them just about evenly. And then, pour the nuts into the sugary syrup and mix.
  5. Now, it' important that you don't make a lot of the syrup, as if you're making a soup. I didn't measure how much I put the ingredients in but I think about half a cup of brown sugar and 1tbsp of honey would suffice. You'd think they're not enough to cover the nuts, but they actually do. Just keep on stirring and mixing. Too much of the syrup would make your granola nuggets too sweet.
  6. Taste, and you'd be surprised.. Haha.. But the steps does not end here. You need to get yourself a non-stick baking parchment. Dump the delicious goodness onto the parchment paper and press them evenly.
  7. Wait till they are a bit hard and cool to touch before you cut them. I think I waited for about 15 minutes. It's really up to you on how big/small you want to cut them. My wrapper was already pre-cut when I bought them, so I had to cut the granolas according to the size of the wrapper.
  8. Finally, wrap! Oh silap, finally, you pop the granolas into your mouth.. yummy!

These make perfect raya tidbits. :) Of course, you can use other nuts, and you can also add in dried fruits as well. If you don't want to waste your time wrapping the granolas individually like I did, I suppose you can keep them in an air-tight jar, but just make sure you keep the layers separated by using parchment. Else, they'll stick to each other like nobody else's business.

Toodles!


Thursday, November 4, 2010

:: Kek Batik ::

Kemas-kemas jumpa ini..

Tetibe dapat idea nak masak kek batik.. Macam 'tingg' ada lampu menyala cerah di atas kepala.. Dah lamaaa tak buat kek batik.. Heh, hari tu puding karamel pun kata dah lama tak buat.. Nampak sangat dah tua.. Eh, eh.. Ehemm.. back to kek batik.. So, pergi beli main ingredient iaitu Biskut Marie Claire.. Eh tak, tak.. Marie Claire tu brand kasut.. Beli Biskut Marie.. Hmm, I wonder how it got the name.. Emm, takpe.. next time je selidik..


So, inilah rupanya Biskut Marie.. Comelnye dah packing by bunch macam ni...

Ini rupa dia bile dah dipatah-patahkan.. Suke, bau die wangi..

Chocolate in a pot.. Milo, koko, *secret ingredient, gula, air dan susu segar.. Bila dah larut, masukkan butter.. Bila butter dah cair, masukkan telur.. Kacau sampai likat..

Masukkan biskut yang dah dipatah-patahkan tadi.. Kacau..


.. dan anda akan dapat hasil seperti ini.. Wah, like the pot calling the kettle black.. hehe..


Rata-ratakan dalam bekas, and refrigerate overnite..

Dan inilah hasilnya setelah dikeluarkan dari dalam fridge.. Kalau tabur serbuk milo, agak2 nampak macam tiramisu tak?


For full recipe and list of ingredients, refer here. Credit to the blog owner.. But I tweaked the recipe a bit.. adding *secret ingredient, susu segar and some chocolate chips.. You really can't go wrong with this.. You can even put anything you fancy, just as long as it makes sense.. Macam saya letak chocolate chips.. But you can also add in nuts, cadbury milk chocolates, and perhaps marshmallow? Janganlah tiba-tiba pergi letak peria katak dalam ni.. Hehe..

Okie dearies.. Till next we meet.. Perhaps an entry about my sister's cake mixer cover? It's almost finished.. Almost.. :) *grinning sheepishly

Oh my secret ingredient? 1/2 tablespoon of nescafe.. *grins.. Not so secret anymore, huh?

Toodles!

Sunday, March 28, 2010

:: Teh-C-Peng.. How I adore thee ::

Nope, bukan nama jiran sebelah rumah atau si penjual sayur di pasar.. Teh-c-peng ialah sejenis minuman yang dikatakan orang berasal dari Sarawak. Oh, tak kisahlah asal dari mana, yang penting sedapp..

 
I was first introduced to this drink by my brother during our family trip to Sabah in 2008. I was fascinated by the 3-layer effect, and it tasted sooo nice too. Kind of like cendol. Nyum nyum.. However, I could not find any mamak that does justice to this drink here in Semenanjung. It is only recently that I’ve decided to make it myself, with full determination that I’d make that three layer work no matter what, plus taste nice as well. I succeeded in creating such effect and taste on my third attempt. Yeay! Want to know my secret? The trick is in controlling the temperature. Shhh.. It’s a secret, yeah? *wink!

 
So here's my version of my special Teh-C-Peng..


Ingredients:
Gula Melaka / gula nipah / gula kabung
4 tbsp of condensed milk
1 bag of tea – I used Sabah black tea that dad brought home from Sabah
Boiling water
4 tsp of sugar
A pinch of salt
3 ice cubes

 
Special Utensils:
1 sexy clear glass – preferably kept in the freezer for about 10 minutes
1 sexy straw

 
Directions:
  1. Prepare gorgeous golden syrup by melting Gula Melaka with a bit of water on a stove.
  2. Prepare tea. Add in sugar.
  3. Keep all of these in the fridge just to cool them down.
  4. Pour in about 1.5 cm deep of cooled, golden syrup into a clear glass.
  5. Add in the ice cubes. Add in a pinch of salt.
  6. Spoon in, gently, about 4 tbsp of cooled condensed milk.
  7. Pour in, or spoon in, again, gently your cooled tea.
  8. Voila! Your special teh-c-peng. Enjoy!
 
Cheerios!